Category Archives: Teaching

Learning By The Book

Standard
Learning By The Book

It’s been an interesting transition for me from teaching in a school setting where there are requirements, grades, and some continuity from one class period to the next, to workshop teaching where the time is limited to a few hours, and the class is more about acquiring an experience based on a single skill. Believe me, this is a BIG adjustment for me. I’m used to having multiple class periods to introduce, reinforce, and direct an in-depth project or skill set. Instead of thinking long-term, I have to focus more on teaching something that can be accomplished in a short period of time, yet still be a challenging, rewarding experience for the participants.

Beautiful books made by adult students in my bookmaking class.

Beautiful books made by students in my bookmaking class taught at Blackbird Studios.

I recently guided students in a bookmaking class, keeping in mind the shift to one-time experience-style instruction. The participants were determined, yet nervous, in their intention to make a book, so I went step by step through the process, which included:

  • selecting and folding all of the papers,
  • preparing the edges for sewing by poking carefully measured perforations on each fold,
  • binding the pages together by sewing over the tapes, into each page,  and linking the ends,
  • and, finally, gluing the covers together.

The class was scheduled to meet for two hours, but ran over by about thirty minutes, as I underestimated how long it would take the group to finish. (Every time I teach, I learn something new about my process and how I might do things differently.) Despite the extra time, I think all the participants were amazed with their creations and left proud of their new books!

Building A Book

Standard
Building A Book

You may (or may not) have noticed the intermittent, yet ongoing, production from my studio. There was the fabric dyeing day, followed by multiple screen printing sessions using my old thermofax machine to burn screens. Now, I’m finally turning the printed and dyed fabric into blank journals and sketchbooks.

Steps showing sewing on tapes.

Top: The finished cover before the pages are attached. Bottom Left and Right: Shows what the in-process sewing looks like from the inside and the outside of the book.

The books have soft covers that I create by attaching the fabrics to Pellon Fuse-n-Shape, a thick, iron on interfacing that gives the covers some thickness without making them too thick. The binding is a variation of the coptic stitch and sewing over tapes. I like this binding because it leaves the spine exposed, and allows the visible stitches to become part of the aesthetics of the finished book. This binding is also sturdy and allows the book to lie completely flat when opened, a desirable quality when writing or drawing.

Orange Cat Book

Hand-dyed fabric with thermofax screen image, exposed-spine sewing on decorative cotton strips. Book is bound with waxed linen.

I have fun coordinating the cords, threads, and fabrics to individualize every book– no two are identical. Sometimes, I choose contrasting fabrics for the front and back of the book to add visual interest. So far, I have constructed six of these soft cover books and, with each one I complete, I learn a little more about the small things I’d like to finesse.

Cat on table with books

A selection of books, guarded over by the original Attack Cat, Miss Bean.

The Journey’s the Destination, Especially in Your Sketchbook

Standard
The Journey’s the Destination, Especially in Your Sketchbook

I used to write in copious detail about the events of my travel day, inserting flowery adjectives, and composing play-by-play explanations. I do not poo-poo that kind of journaling. People write for many of the reasons that artists art. Now, however, I tend to take a more visual approach. Sometimes I pre-divide pages with shapes, not really knowing what content they will hold. On other pages, I respond to a scene, or, just draw things that inspire me on the journey. For the first time on this trip, I included some of the thoughts of my travel companions, and discovered that by doing so, the story became more complete.

Sketchbook Pages from Panama Trip

Left: I designed this page in pen without knowing ahead of time what the squares would contain. Right: Special things I wanted to remember after the trip.

It’s not as hard as you think to make full pages of drawings when you’re traveling. I tend to block a few things in, or throw a few words on a page, and then, when when I’m waiting for a meal, in transit on a plane or in a taxi, or back in the room for the night, I fill in with more drawings or bursts of text. Sometimes, I use photos I took during the day as reference. My travel kit (see this post) allows me a lot of flexibility so that my supplies are easily at hand.  When I get home from vacation, I continue to add color and detail until I have a complete collection of pages from the trip.

Sketchbook Drawings

Left: An unfinished page inspired by molas, fresh avocados and a cat. I’ll paint this in now that I’m home. Upper Right: A quick sketch of the skyline from a photo I’d taken earlier in the day. Lower Left: Memories, impressions from traveling companions, and a description of our hike written on the leaf shapes I’d encountered on the trail.

Tips for Traveling, or, How to Make a Book While You’re Having Tea

Standard

I created one of my first handmade books on a summer trip when I ran out of space in the store-bought journal I had along. So, I improvised by constructing an emergency book out of hotel note paper, a store bag from a souvenir purchase, and the hotel sewing kit. That was 20 years ago. Here is an updated version of that now-historical experience. For research purposes (really, because it was fun and I wanted to) I made a found-materials book this morning while staying with a relative. This is how I did it– then and now — and you can, too!

Gather your supplies. This is fun. Be open to discovering or usurping supplies from wherever you encounter them.

Pamphlet book supplies

I thought I’d recreate my experience of making a book with whatever I could find. At a relatives, I hunted around the phone desk drawers and home office area and found note pad papers and a push pin.

  • Paper for pages: I have used papers such as the notepad next to the phone in a hotel room, receipts, and collected brochures. You could also us discarded documents from a business office’s recycle bin, uncolored pages from your child’s coloring book, anything with blank spaces for drawing or writing.
  • A cover: something slightly heavier, from the packaging from your lunch, to a shopping bag, to the menu you “borrowed” from a restaurant, or the cover stock from that paperback you were going to leave in the hotel anyway.
  • Needle: Doesn’t have to be an actual needle, just something that will allow you to get your thread or string-like substance through a hole.
  • A pushpin: easily obtained from a random coffee shop bulletin board, or the junk drawer at your mother-in-law’s house.
  • Thread or Cord: I was lucky enough to find a travel sewing-kit in my hotel room at that time. Since then, I’ve used the raffia off of a table decoration, the curly ribbon from a balloon centerpiece, and a shoelace.
  • Scissors, if you can locate a pair. Otherwise, folding and tearing can be your friend, and can yield rustic results.
Steps in making a pamphlet book

Left: After I folded all of the papers, I stacked them, forming my “paper taco.” Right: Used the pushpin to poke my thread, minty dental floss, through the holes I’d just poked.


How to Proceed.
These are some general steps to follow. Feel free to improvise.

Collage of book making steps.

Left: After I sewed the pages together, I trimmed the excess cover paper to match the largest page size. Top Right: I used a glue stick to attach one of the note pages to the front, inside cover. Bottom Right: I found a business envelope in the recycling bin that I cut and glued into the back page where I inserted a blank index card.

Assess your paper situation. The pieces don’t necessarily have to be the same size. In fact, variation can add a little whimsy. Fold your collected papers in half and stack them together. These will be used for the inside of your book.

Make a cover out of the heavier found material. It should be the same size as your biggest piece of paper you are using for the inside pages. You might have to cut or tear the bag, packaging, cardboard, or whatever you found.

(Attempt to) fold your cover in half. This will be easy if it’s the material is not too heavy. Sometimes, you can take advantage of existing creases, like say, at the fold of a box corner. Or, in the case of the photo examples here, I used a blank greeting card.

Stack all of your papers together. Make a paper taco with the cover on the outside.

Now comes the dangerous part. Without drawing blood, poke two holes in the folded, inside edge of your stack. Leave at least ½” from the top and bottom of the book.

Gather your sewing material. If you’ve got something substantial, like raffia or ribbon, or a shoe lace with a plastic seal, you might be able to roll and poke the end through the hole you’ve made without a needle. If you have thread and needle, proceed as you would if you were sewing regularly. Double or quadrupling the thread for strength.

Assemble the book by sewing from the inside top hole to the outside of the book. Sew back into the other hole. You might repeat this several times depending on how much string you have, or how strong your cord is. In the case of dental floss (as per photo example) I sewed through twice.

Once you have both ends on the inside of the book, tie a firm square knot. You could also decide you want the knot to be on the outside spine of the book because it’s nice and decorative when the excess hangs down.

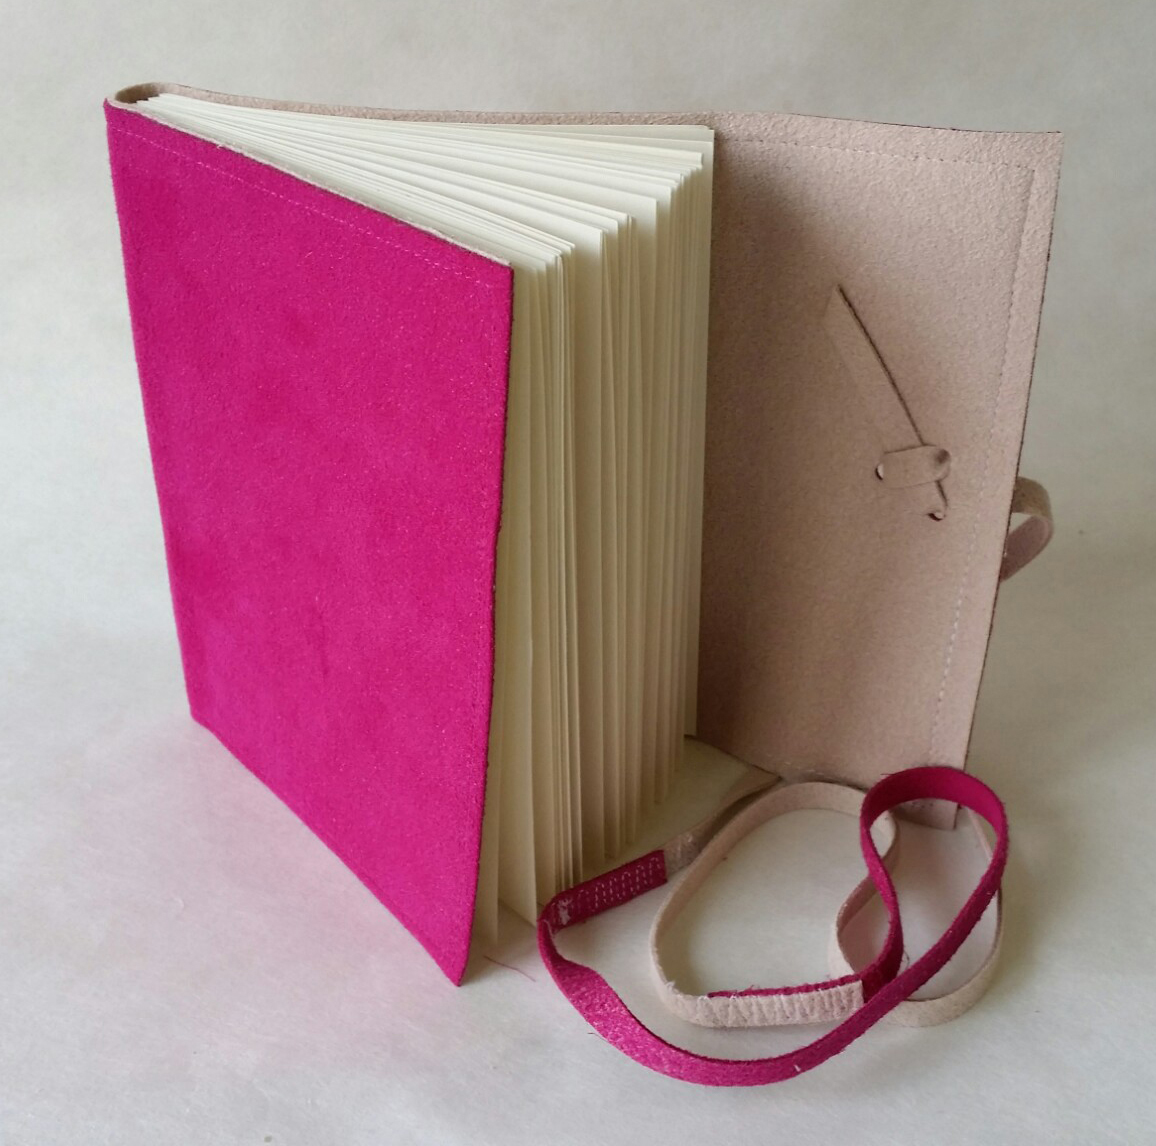
And, voila! You have a pamphlet book made from found materials ready for notes, musings, drawings, or storing small mementos.

Arrangement of art supplies with tea cup.

The random, blank greeting card I found in a desk drawer worked well for the cover. This little, sturdy friend will travel in my purse as an idea book. I did it all while having my morning tea!

I Would Dye For You

Standard

Cotton fabric comes in plenty of solid, consistently dyed colors. Sometimes that’s exactly what I need, and what I expect when I purchase it. However, I appreciate the depth of layers and happenstance that occur when I hand-dye my own cloth.

Pink and purple fabric.

Fabrics dyed using low-water immersion techniques with Pro MX Reactive Dye.

I use the low-water immersion dye method, so you can forget that stinky pot of boiling chemicals steaming up the kitchen. Each piece of cloth is individually wrapped in it’s own packet or soaking in a container, left to absorb just enough dye to saturate the cloth. This allows for some migrating, pocketing, and patterning to occur, allowing for variations in the final surface. Hand-dyed cotton

I dyed 8 half-yards to use as the substrate for printed book covers. While the colors are nice, they are not as intense as I’d hoped. I lost a lot of dye in the wash-out, and it took repeated rinsing to get the water to run clear. I don’t know if the muslin I’m using just doesn’t hold the dye, (I wonder this because I over-dyed an older piece of heavier cotton from my stash and it held the same dye really well,) or there’s an effect from the softened water I used for rinse out, or if there’s something else I’m missing. If you know what I did wrong, please let me know!

In any case, I ended up with completely useable, pretty cloth. It will become more complex when I manipulate it further with printing and sewing.

Fabric drying on a clothesline.

My “drying room.”

I first learned this technique from Lisa Kerpoe at the Southwest School of Art a few years ago.

Here’s what I posted about it then.

This is all your fault…

Standard
1000 Likes with Cats

My muses, clockwise from top left: Cleo (2009), Bean, Garfield (2014), Vera, Lucy, and Emily (2014)

You may notice a few changes at Art Is Not For Sissies, like a new header and formatting, and a little more headline action for Attack Cat Studio. When I reached the “1000 Likes” milepost this week, I decided the best way to say THANK YOU!! to my readers was to update my look. You know, make it more spiffy, add some organization, tell you a little bit about myself…some important details for someone who has reached ONE THOUSAND likes. It is my own fault that it took me four years of erratic blogging to get here, and, frankly, compared to some bloggers, 1000 likes is something they do every day. But, hey, the tally means a lot to me, and because of you, here we are at this moment of transformation. Cheers, friends!

Handmade Monday Block Out

Standard

I am assembling small printing blocks because I enjoy…

  • Multiples: Being able to reproduce the same, or similar image repeatedly and in variation so that there is more than one.
  • Repetition: I am naturally attracted to patterns. There is beauty in organization, design, and structure. Can be organic or geometric.
  • Layered imagery. Inspired by the effects fabric artists get with cloth and my long-time experience in using watercolor. I want to create depth through layering of color and image.

    Rubber stamp print

    Simple rubber stamp made with Speedy Cut. I used this to give a faux linoleum print feel.

I used Speedy Cut for the large square block, and sticky-backed flexi cut, which is a thin, easy-to-cut rubber material, mounted to a square of thick binder’s board for the shape blocks.

Handmade cat stamp

Relief blocks made out of sheets of flexi-cut mounted on heavy binder’s board.

Blocks were then printed onto a piece of handmade 100% cotton rag paper that I previous painted with watercolor and left to dry covered in bubble wrap. The resulting image leaves the circle pattern of the bubble wrap in the dry paint.

Block print pattern. Person holding block print pattern.

Top: Different trials with stamps.
Bottom: Me with the final result.

This paper will get used as a cover for a handmade book, so stay tuned! More about that, later.

Handmade Monday: Japanese Stab Binding

Standard

Simple, yet elegant, the Japanese Stab Binding is one of the first book structures I learned how to make. There is no glue involved and it takes the most basic materials. These particular covers are hand printed Nepalese Lokta papers bound with waxed linen cord, but any papers, threads, yarns, or cording could be used. It’s versatile, secure, and easy to make.  As an artist, it was satisfying for me to witness the little book gems that emerged.

Steps for Stab Binding

Some of the steps to achieve a side-sewn binding. AKA Japanese Stab Binding

Japanese Stab Binding. Carol Parker Mittal book binding.

I participated in a make-it-take-it open house at Blackbird Arts last week where I taught visitors this structure in 20 minutes or less!

Handmade Monday Magenta

Standard

Introducing a new regular feature to Art Is Not for Sissies— Handmade Monday! It’s a place where I will highlight some of my other art #notcats (gasp!) Today, I reveal a little about the process of making my suede-covered blank books. You can inspect my craftsmanship more closely at my Etsy Shop, Attack Cat Studio.

Hole punch, Carol Parker Mittal

Getting the book ready for the final step—adding the tie closure.

Magenta Book Detail. Carol Parker Mittal

Detail of the cord closure on the book flap.

Magenta Book, Carol Parker Mittal

Hot Mama Magenta! Book ready to go.